Enable Native Attachments in Oracle HCM Identification Info: Passport, Visa, and More
Employees add their passports, visas, citizenship records, and driver’s licenses in Identification Info, but out of the box the Redwood forms have no place to upload the document copy itself. There is a native way to add one — no custom component, no code, no separate document upload step. A single Visual Builder page property attaches Oracle’s standard Document Records upload area directly to the form, and it exists for every Identification Info section: Passports, Visas and Permits, Citizenship, and Driver’s Licenses. This walkthrough uses the Passport section as the worked example; the steps are identical for the others.
This guide covers the no-code Visual Builder configuration. For the transaction payload, REST resources, and DOR relationship details behind it, see How Oracle Fusion HCM Creates Passport and DOR Attachments in One Transaction.
What you get
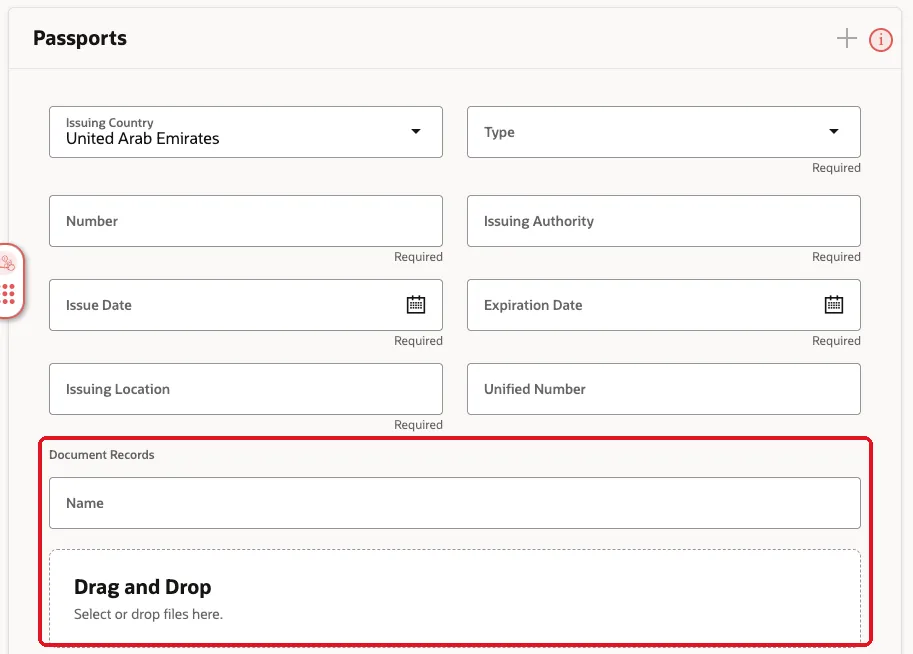
After this configuration, the Passport form in Identification Info shows a Document Records area with a Name field and a native Drag and Drop upload zone. The employee enters passport details and uploads the copy in one step; Oracle creates the passport record and its Document of Record together and stores the file through the standard HCM attachment framework.
Step 1 — Open Identification Info and edit the page
As a user with page-composer access, open Me → Personal Information → Identification Info (or the person’s Identification Info page), then open the Settings and Actions menu and choose Edit Page in Visual Builder Studio.
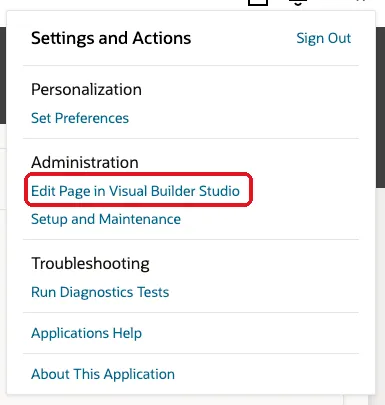
Visual Builder Studio opens on the identification-info page in your active sandbox.
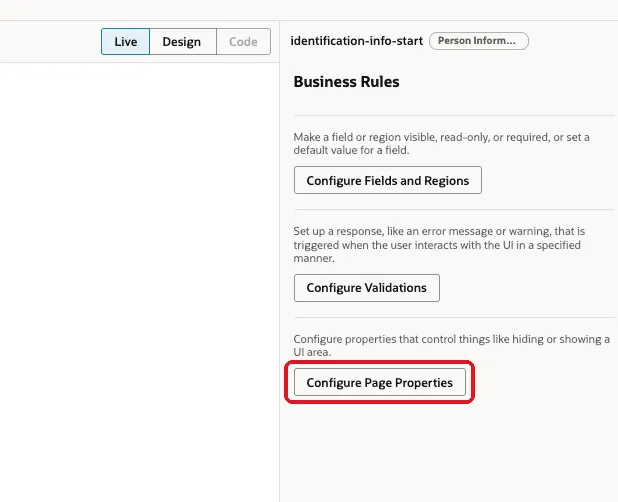
Step 2 — Open Business Rules → Configure Page Properties
In Visual Builder Studio, open Business Rules for the page. Three options appear: Configure Fields and Regions, Configure Validations, and Configure Page Properties — choose the last one.
Step 3 — Set the document type on the Passports section
In Page Properties, expand the Passports section. Alongside the Guided Journey and Add-icon properties you’ll find the one that matters here:
Set Document type at the Passports Section Level = Passport
Pick the document type from the dropdown — it lists the document types defined in your environment.
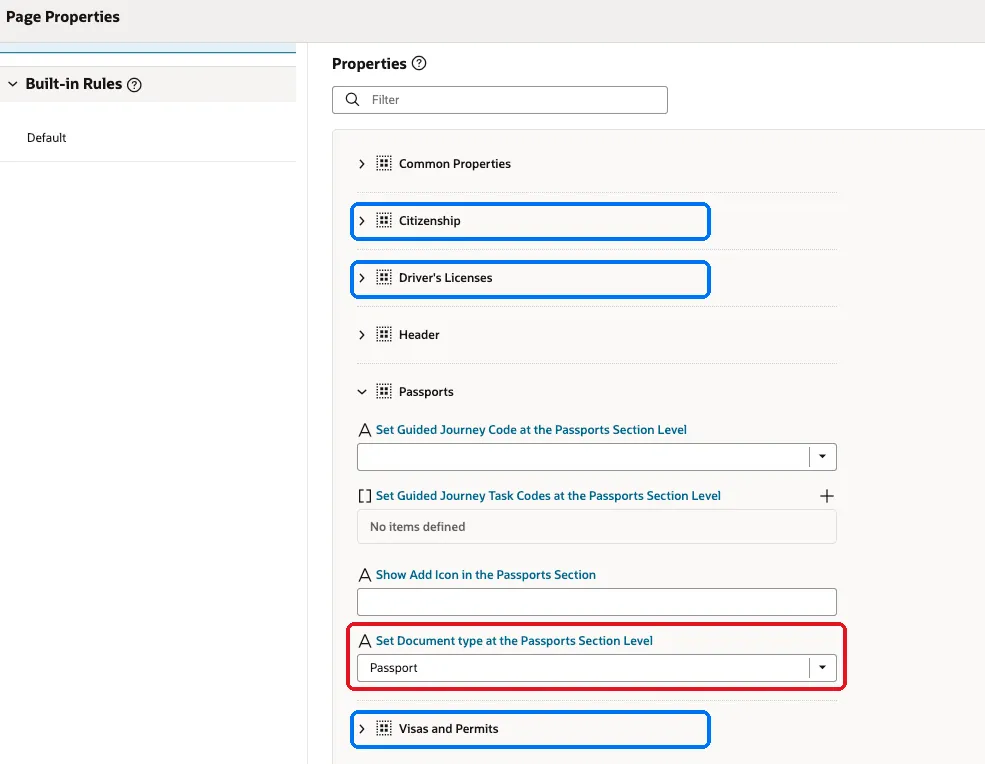
Note the sections highlighted in blue — Citizenship, Driver’s Licenses, and Visas and Permits each have their own section entry with the same section-level document type property. More on reusing this for those records below.
Step 4 — Save and publish
Save the rule and publish your sandbox/configuration the same way as any other Visual Builder change. The setting is a business rule on the page, so it follows your normal sandbox → publish lifecycle.
Step 5 — Verify the Passport form
Reopen Identification Info and add or edit a passport. The form now shows the native attachment experience below the passport fields: a Document Records heading, a Name field, and the Drag and Drop file area.
Step 6 — Verify the stored document
After submitting, open the passport’s Document Records panel. The uploaded file appears as a document record attachment — viewable and downloadable through the standard experience.
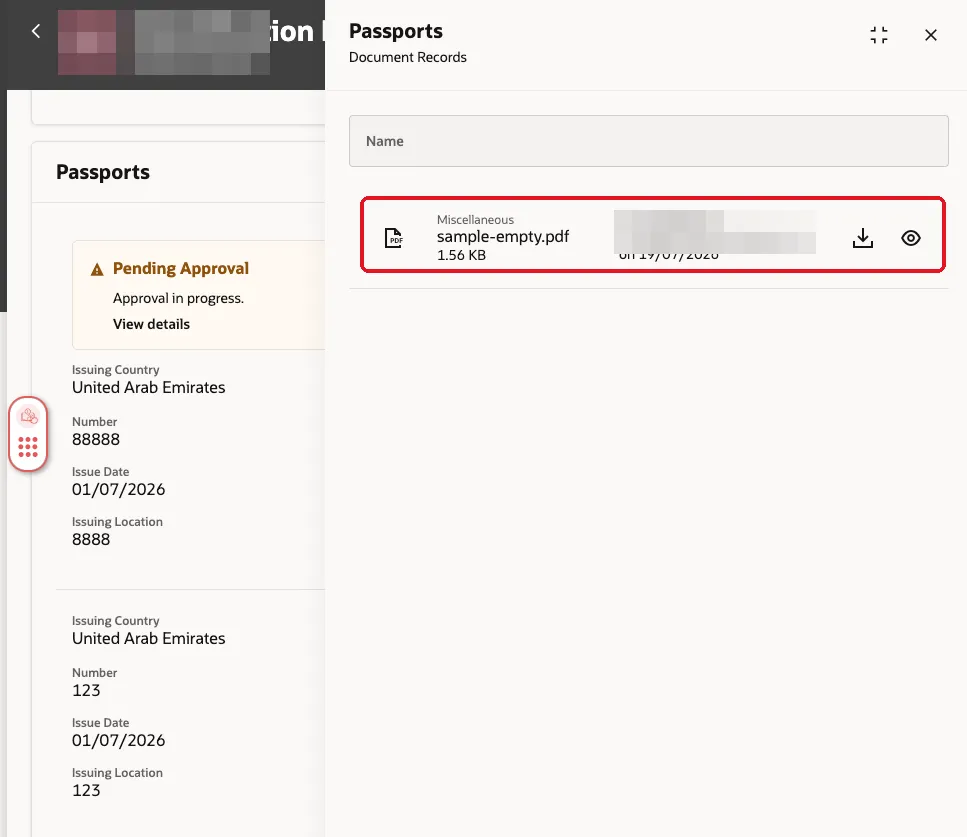
If your document records are subject to approval, the passport change shows Pending Approval until the transaction completes — that’s the standard HCM approval flow applying to the combined passport + document record transaction, not an error in the configuration.
The same setting works for visa, citizenship, and driver’s license attachments
This is not a Passport-only feature. The Page Properties panel lists a section for each Identification Info record type — Citizenship, Driver’s Licenses, Passports, and Visas and Permits — and each exposes its own Set Document type at the … Section Level property. To let employees upload a visa or work permit copy, expand Visas and Permits and set its document type; for a citizenship certificate, use the Citizenship section; for a license copy, Driver’s Licenses. Publish once and each configured section gets the same native Document Records area on its form.
One rule of thumb: map each section to its own matching document type rather than reusing one generic type everywhere. The document type drives where the record files under the person’s document records, its security, and any approval routing — a visa stored under a passport document type will confuse both reporting and document type security later.
Troubleshooting
- No Document Records area after publishing — confirm you set the property on the Passports section (not Common Properties), and that you’re testing with the sandbox/publication that contains the rule.
- The document type dropdown doesn’t list your type — the document type must exist (Document Types task in Setup and Maintenance) and be visible to the user’s document type security before it can be selected or used.
- Upload works but the file isn’t visible to another user — that’s document record security (person security profile / document type access), not the page configuration.
What happens under the hood
The upload area isn’t a widget bolted onto the form — Oracle submits the passport and its Document of Record as one transaction, linking the DOR to the passport record. If you need that level of detail — the seeded GLB_PASSPORT document type, the PER_PASSPORTS/PASSPORT_ID relationship, CallerContext, and the batch payload — the integration deep dive walks through it, and the documentRecords REST API guide covers reading those documents back out through the API.
None of that structure is visible from the page you just configured, which is why we built OPAL — a free offline explorer for the entire Oracle Fusion API surface. Type documentRecords or passports into it and you see every field, q filter, and child resource this configuration writes to, straight from the real spec, without hunting through the docs.
This post is part of our complete Oracle HCM API guide — auth, base URLs, q filters, finders, and the key endpoints in one place.